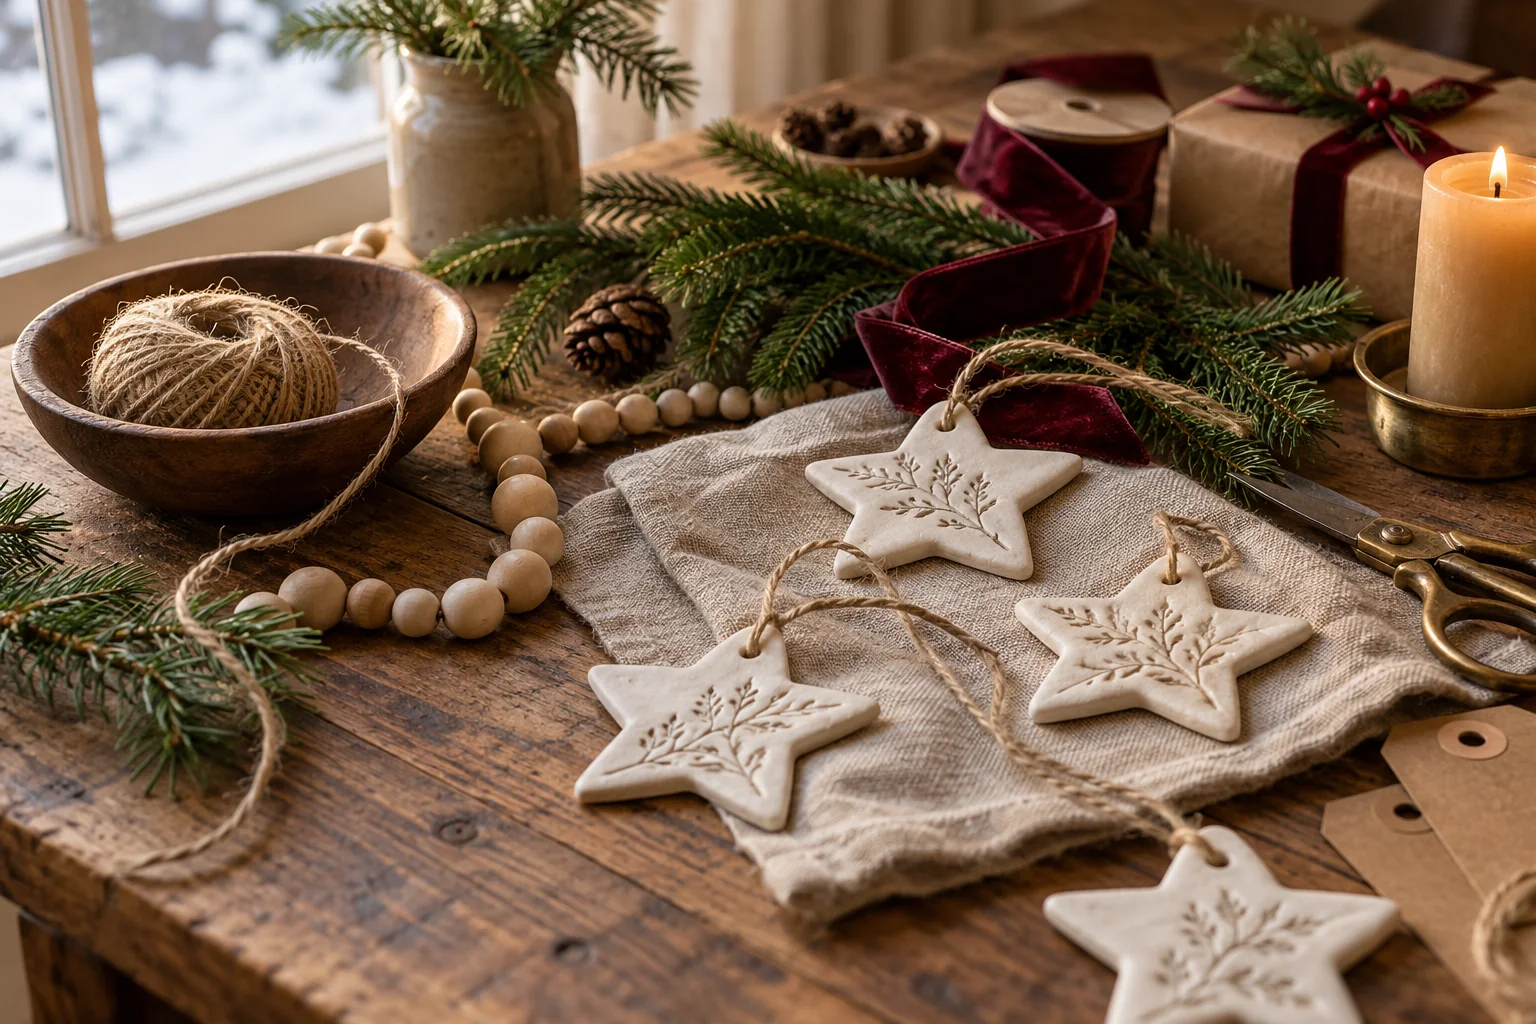

Rustic Christmas DIY decorations are easier to make when you start with simple materials: small wood slices, leftover fabric, paint, and greenery saved from an old garland. A little sanding and layered color can make a plain craft-store blank look like an ornament that has been hanging on the family tree for years.
These projects cover two handmade favorites: dimensional snowman ornaments with wintery wood-slice backgrounds, and a miniature evergreen tree displayed in a thrifted picture frame. You’ll also learn five practical techniques you can reuse on holiday tags, tabletop signs, and handmade gifts.
Choose your rustic Christmas craft
| Project | Best materials to reuse | What you’ll practice |
|---|---|---|
| Wood-slice snowman ornament | Wood rounds, small wooden figures, napkins, fabric scraps | Decoupage, dry brushing, distressing |
| Vintage stamped ornament | Painted tags, small wood plaques, metal signs | Layered texture and partial stamping |
| Framed evergreen tree | Old photo frame, cotton fabric, leftover garland | Textile backing, dimensional arrangement, gilding |
For a consistent look, stick to warm white, weathered brown, charcoal, evergreen, and small touches of muted red or antique gold. You can change the shapes and supplies without losing that old-fashioned, primitive Christmas feel.
Gather the materials you already have
- Bases: wood slices with hanging holes, thin wooden tags or plaques, and a small secondhand picture frame.
- Paint and finish: black acrylic paint, warm or antique-white acrylic paint, dark antiquing wax, a suitable decoupage medium, and optional metallic gold wax.
- Tools: small brushes, fine-grit sandpaper, scissors, a wooden skewer, craft glue or a low-temperature glue gun, and needle-nose pliers for small embellishments.
- Decorative details: winter-print napkins, a half-round wooden snowman or another small wooden cutout, homespun fabric, twine, miniature greenery, artificial berries, and bells or stars.
- For the framed tree: light cotton muslin or another tightly woven neutral fabric, narrow trim, and two short evergreen sprigs.
Use these as a flexible supply list, not a shopping checklist. A plain wood tag can replace a slice, while neutral cotton cut from an old curtain may work as the framed tree’s background. If you cannot find a half-round snowman, paint a flat wooden silhouette instead; the result will have less dimension but the same visual character.
1. Decoupage wood-slice ornaments without ragged paper edges
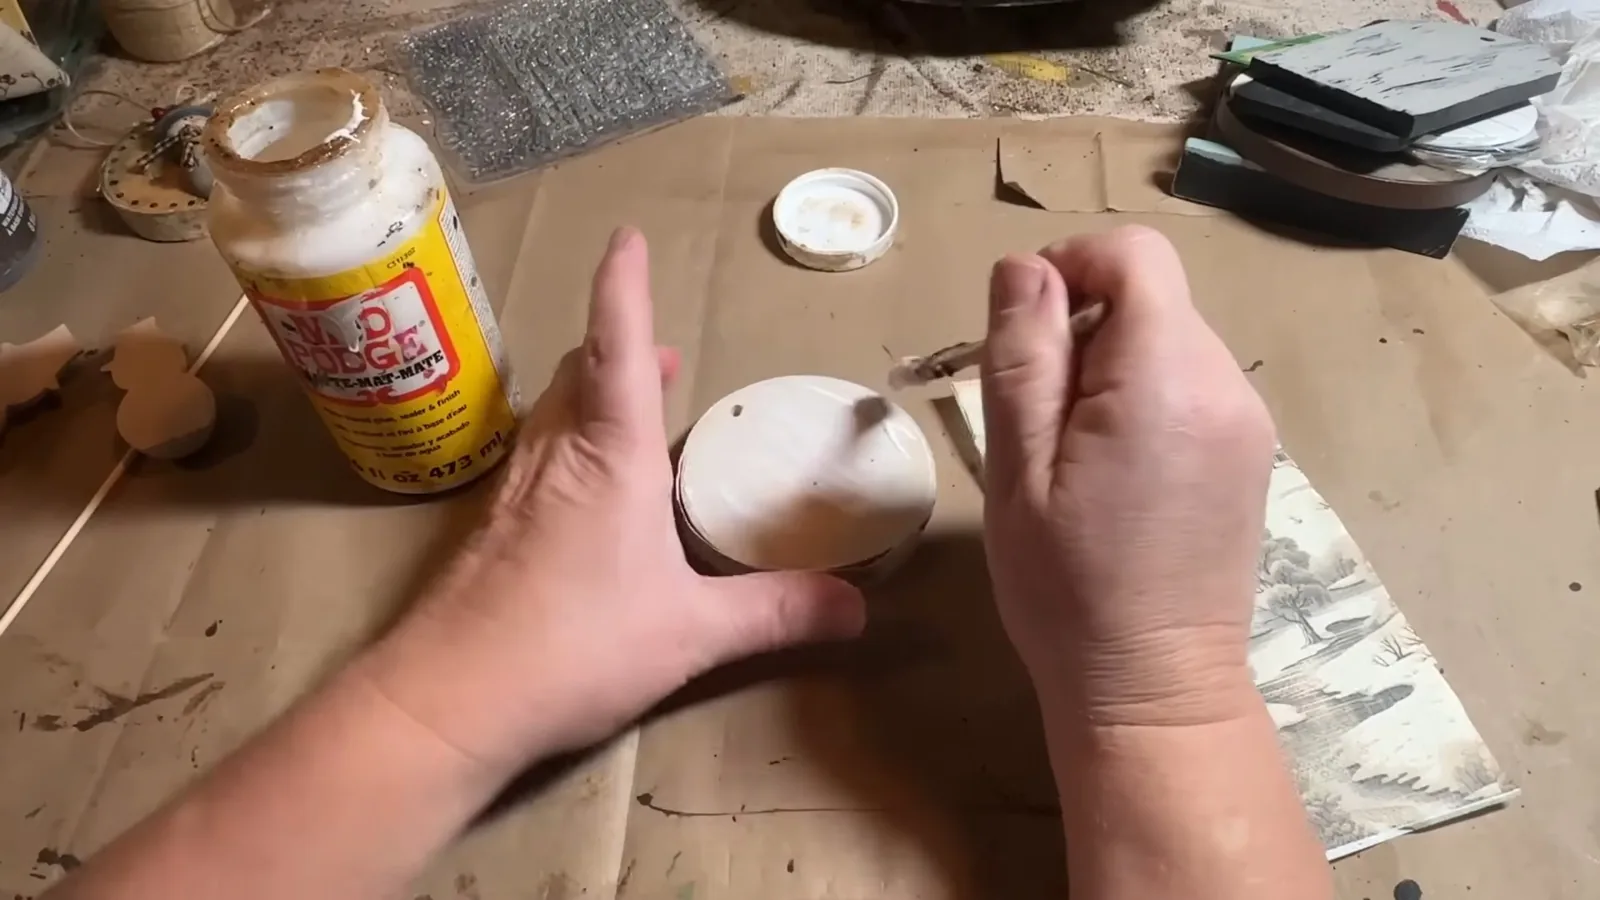
A printed napkin is an inexpensive way to add a detailed winter scene to a wooden ornament. The secret is what goes underneath it. Thin napkin paper becomes translucent when glued down, so a dark wood or black-painted background can dull the pale parts of the design.
- Prepare a light base. Sand any rough areas, remove the dust, and paint the face of your wood slice in warm white. Allow the paint to dry completely.
- Separate the napkin. Peel away the plain backing layers, keeping only the thin printed layer. Cut a piece slightly larger than the ornament.
- Apply the design. Brush on a thin, even coat of decoupage medium. Lay down the printed layer carefully and smooth it gently from the center outward. Avoid repeated brushing that could tear wet paper.
- Trim with downward sanding strokes. Once the adhesive is dry enough to handle, use fine sandpaper along the edge of the wood. Move from the face down toward the side so the abrasive cuts away the excess paper instead of lifting it.
- Seal after drying. Add a thin compatible topcoat if the project needs protection, following the product’s drying and curing directions.
Common mistake: trying to sand a still-wet napkin. When the edges bunch up, pause and let the surface dry before attempting to remove the torn area.
2. Make a primitive snowman ornament with an aged finish
Credits: Repurposed My Way ~ Shelly, CC BY;
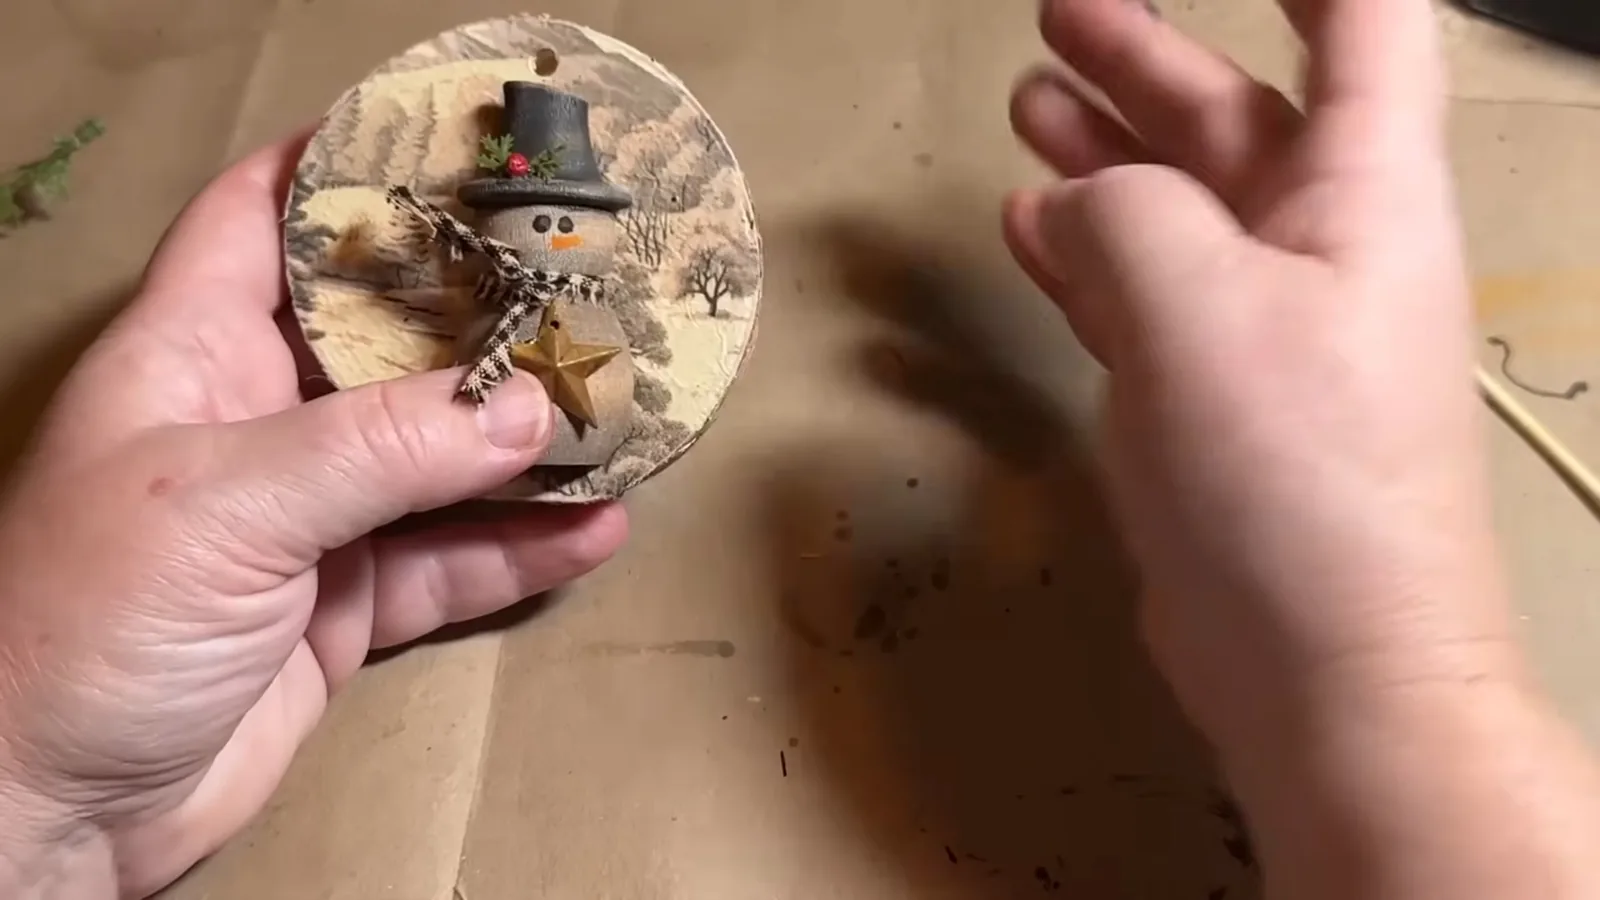
The snowman adds depth to the printed background. A charcoal hat, softly painted body, and tiny fabric scarf keep the design charming without making it overly polished. A wooden half-figure works especially well, but a small flat cutout is fine too.
Paint the body and distress the hat
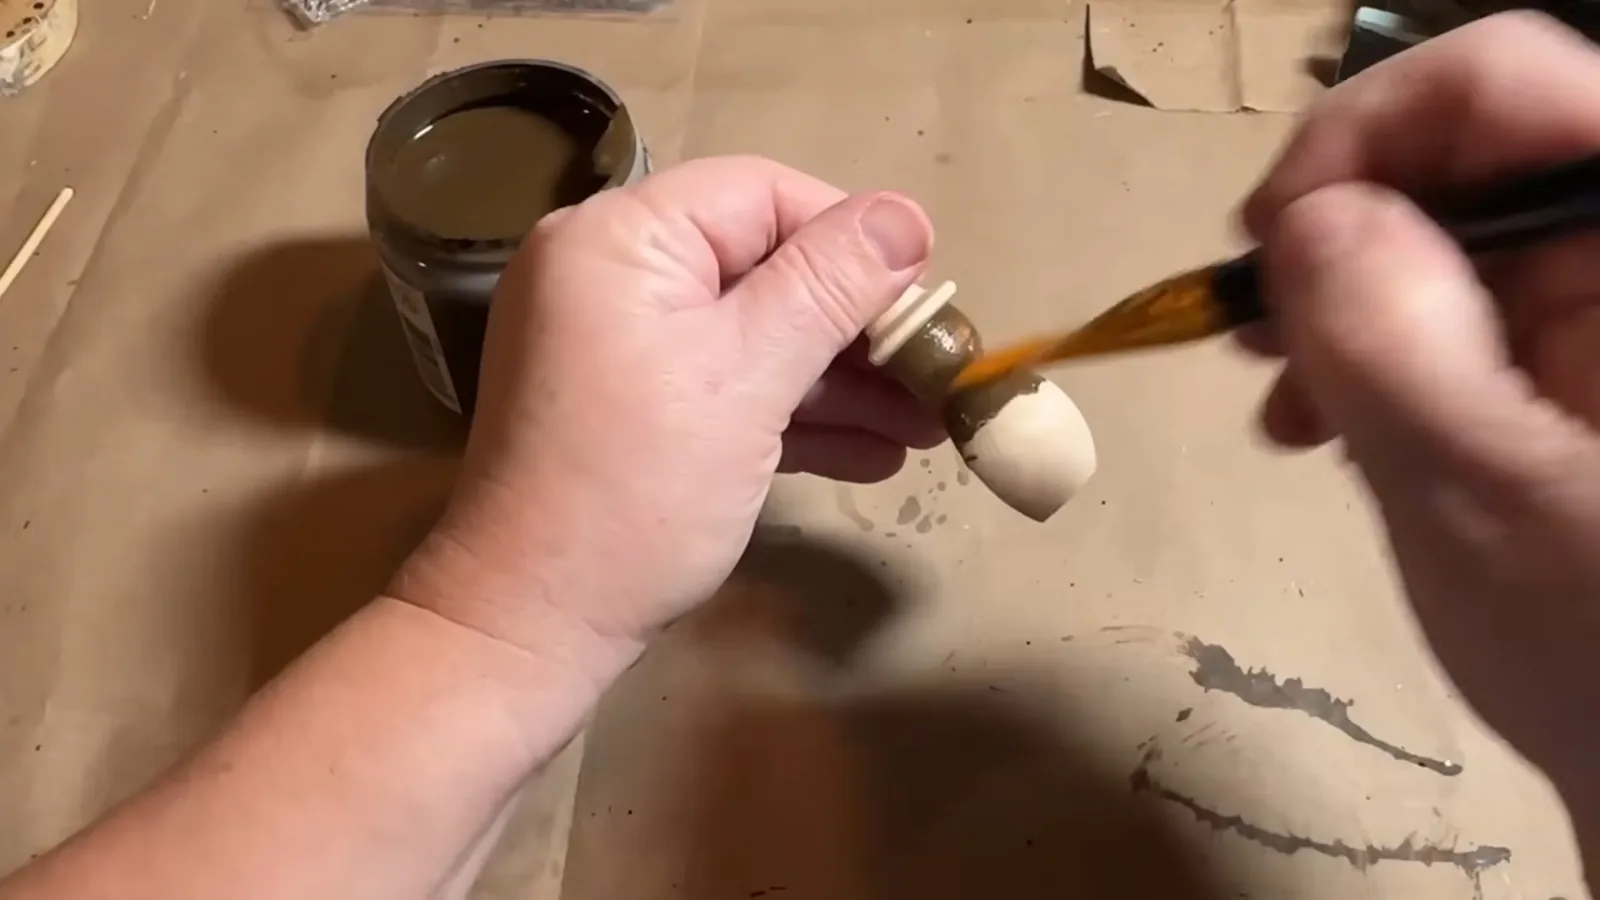
- Sand sharp edges and wipe away the dust. Apply dark antiquing wax to the exposed wooden body, then wipe away the excess. Let it dry according to the product directions.
- Brush the hat with black acrylic paint. Once dry, lightly sand the edges and high points until hints of bare wood show through.
- Work a little dark wax into those exposed areas to make the fresh wood look brown and timeworn. Test this finish on a spare piece if your paint and wax are from different product lines.
- Load a brush with antique-white acrylic paint, then wipe almost all the paint off onto paper. Drag the nearly dry bristles lightly over the body for a broken, chalky finish.
Dry brushing works best with less paint than you think. You can add a second whisper-thin layer, but a thick opaque coat will hide the aged wood beneath it. Because paint may adhere poorly over some waxes, test your combination first and avoid promising a durable surface until it has cured.
Add a face and a few small details
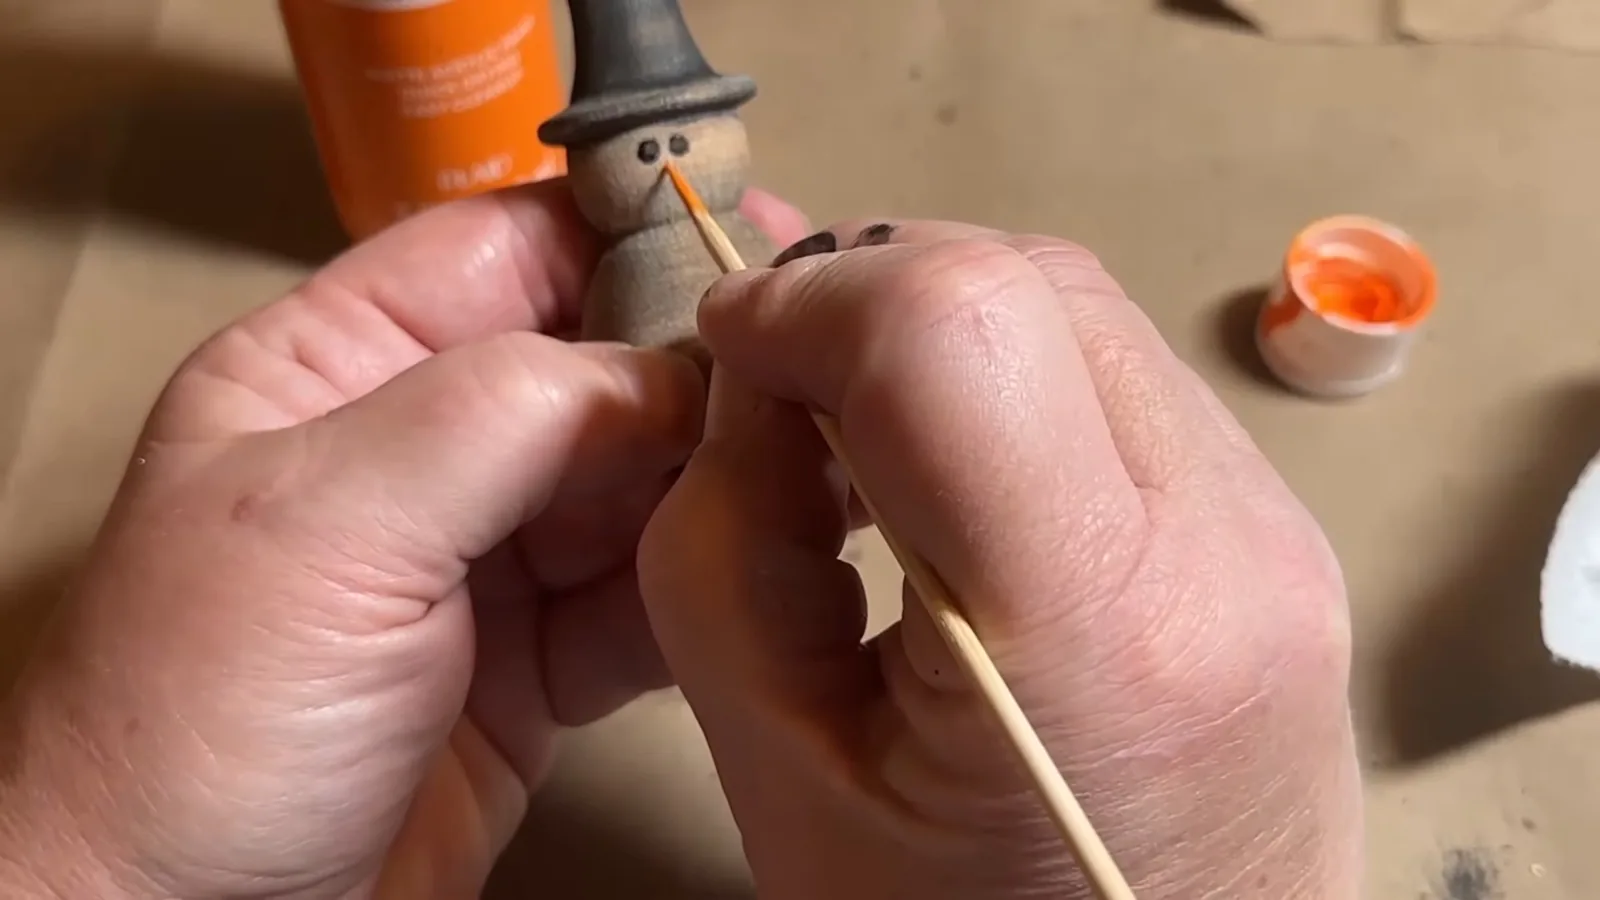
The blunt end of a wooden skewer makes neat dot eyes. Dip the tip in black paint, touch down twice, and allow the dots to dry. Use a pointed tip with orange paint to mark a tiny carrot nose. The features can be very simple; oversized eyes tend to overwhelm a small figure.
Tie a narrow strip of black-and-tan homespun fabric around the neck. Add a small rusty-look star, a berry, or two short sprigs of faux cedar near the hat brim. If the greenery looks too bright, tone it down carefully with a little antiquing wax. Keep wax away from areas that still need glue: adhesives generally bond better to clean, unwaxed surfaces.
Attach the figure to the finished wood slice with adhesive suitable for the materials and the ornament’s weight. Keep the hanger unobstructed, and check that the finished piece hangs straight before the glue sets.
3. Use rubber stamps for instant vintage texture
Credits: Repurposed My Way ~ Shelly, CC BY;
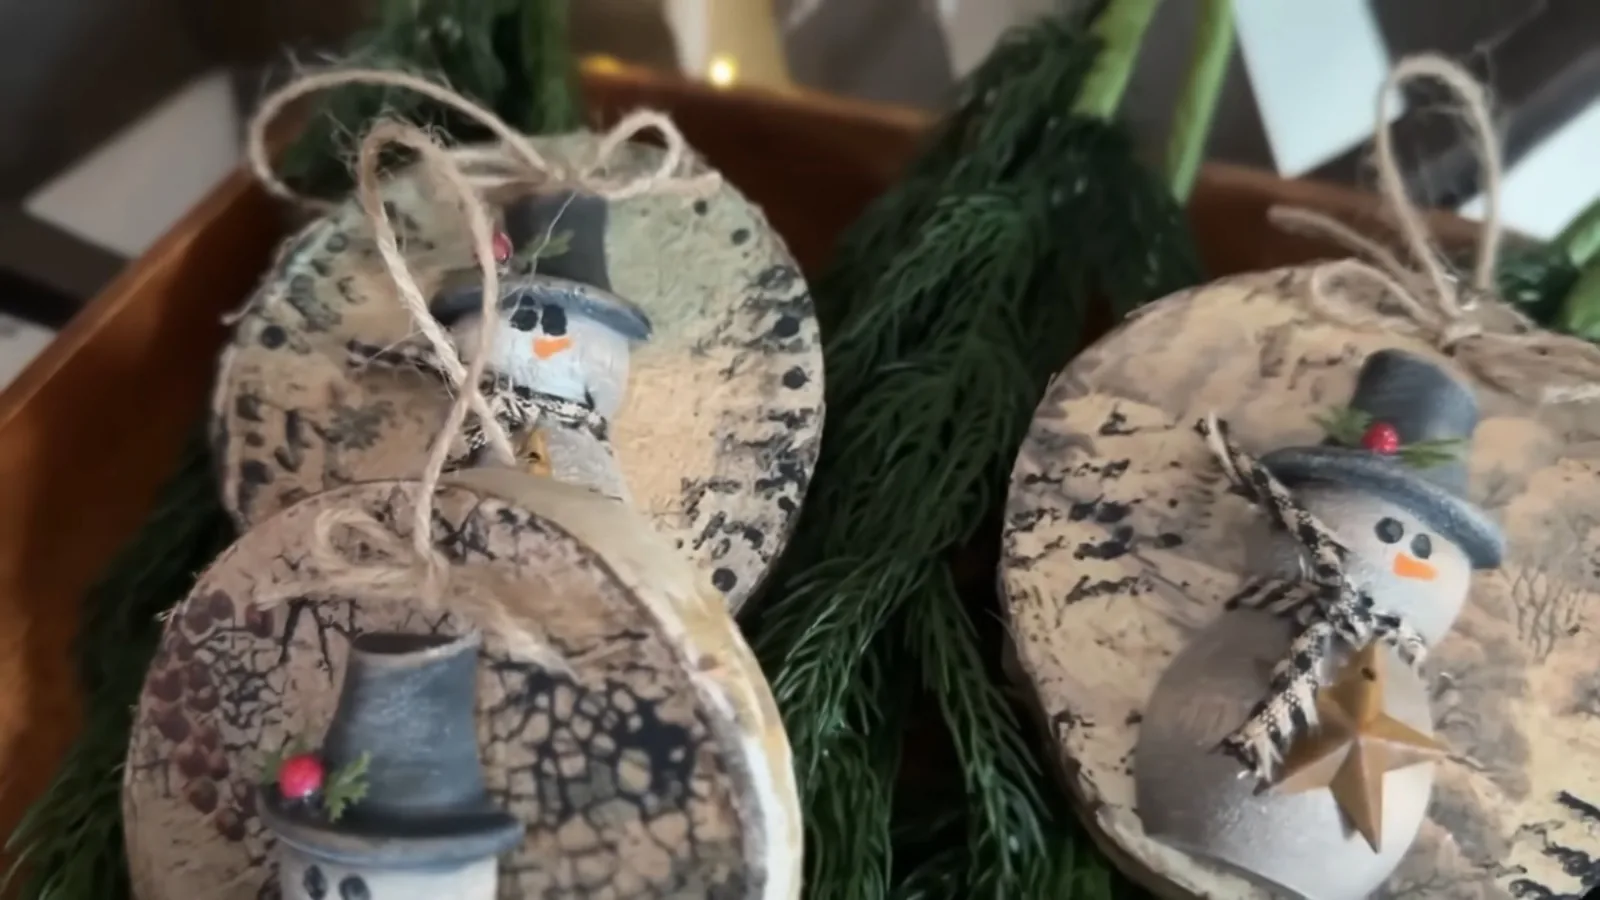
You do not need to hand-paint an elaborate background. A crackle-pattern stamp, small script stamp, or distressed print can add just enough contrast to break up a plain surface.
- Begin with a dry, painted or decoupaged base.
- Apply a small amount of acrylic paint to the raised parts of a stamp using a nearly dry brush, or use a suitable ink pad.
- Press only parts of the stamp onto the surface. Rotate the stamp, leave gaps, and vary the pressure so the marks resemble faded old printing.
- Let the pattern dry before adding your dimensional embellishments.
For a subtler effect: test a dark brown or muted gray instead of stark black. Choose stamps with small details that remain readable at ornament size. Clean paint from the stamp promptly and check that the stamp material is compatible with acrylics.
4. Turn an old picture frame into a miniature evergreen tree
Credits: Repurposed My Way ~ Shelly, CC BY;
This small framed Christmas tree makes a lovely shelf or mantel accent, and it uses surprisingly little greenery. The light woven fabric contrasts with the evergreen branches, while the dark frame creates a crisp outline.
Prepare a fabric-backed frame
- Remove the glass or clear plastic from a small picture frame. Set it aside; the finished arrangement needs enough open depth for the branches.
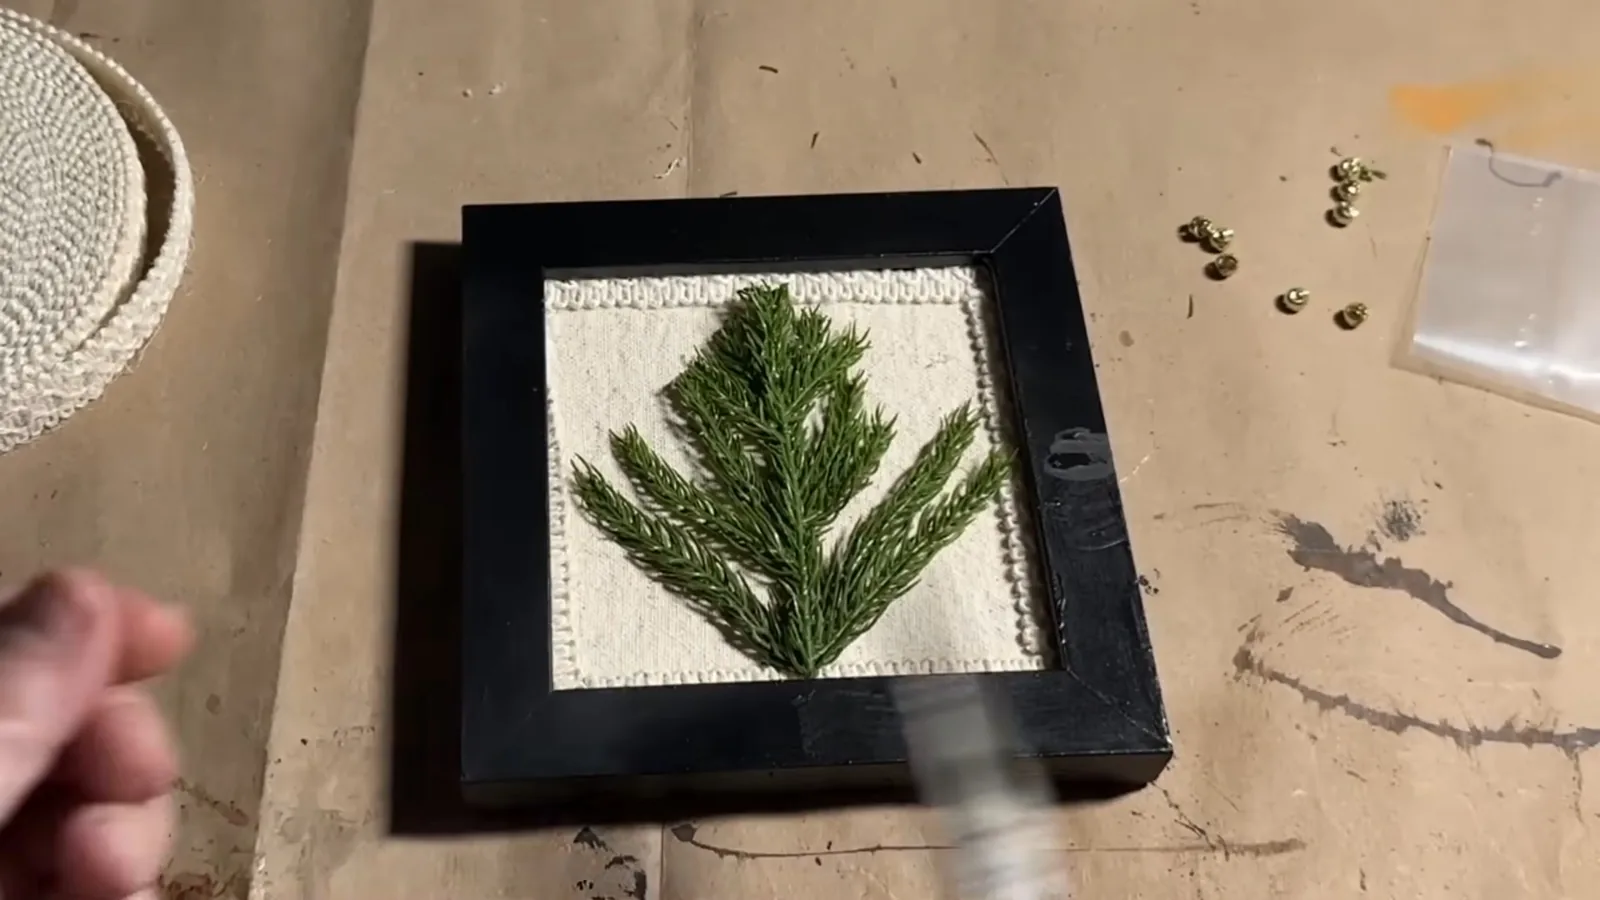
- Cut cotton muslin slightly larger than the backing board. Wrap the fabric around the edges and secure it neatly on the reverse. Keep the front flat and taut.
- Add narrow decorative trim at the fabric border if desired. If your ribbon is bulky, split it lengthwise or choose thinner trim so the backing still fits into the frame.
- Test-fit the board before gluing the greenery in place.
Build the tree and finish the edges
Overlap two small artificial evergreen sprigs to form a fuller triangle. Arrange them on the fabric before adding adhesive, with the widest branches at the bottom and the tips at the top. Fasten the central stems and any lower branches that project too far forward.
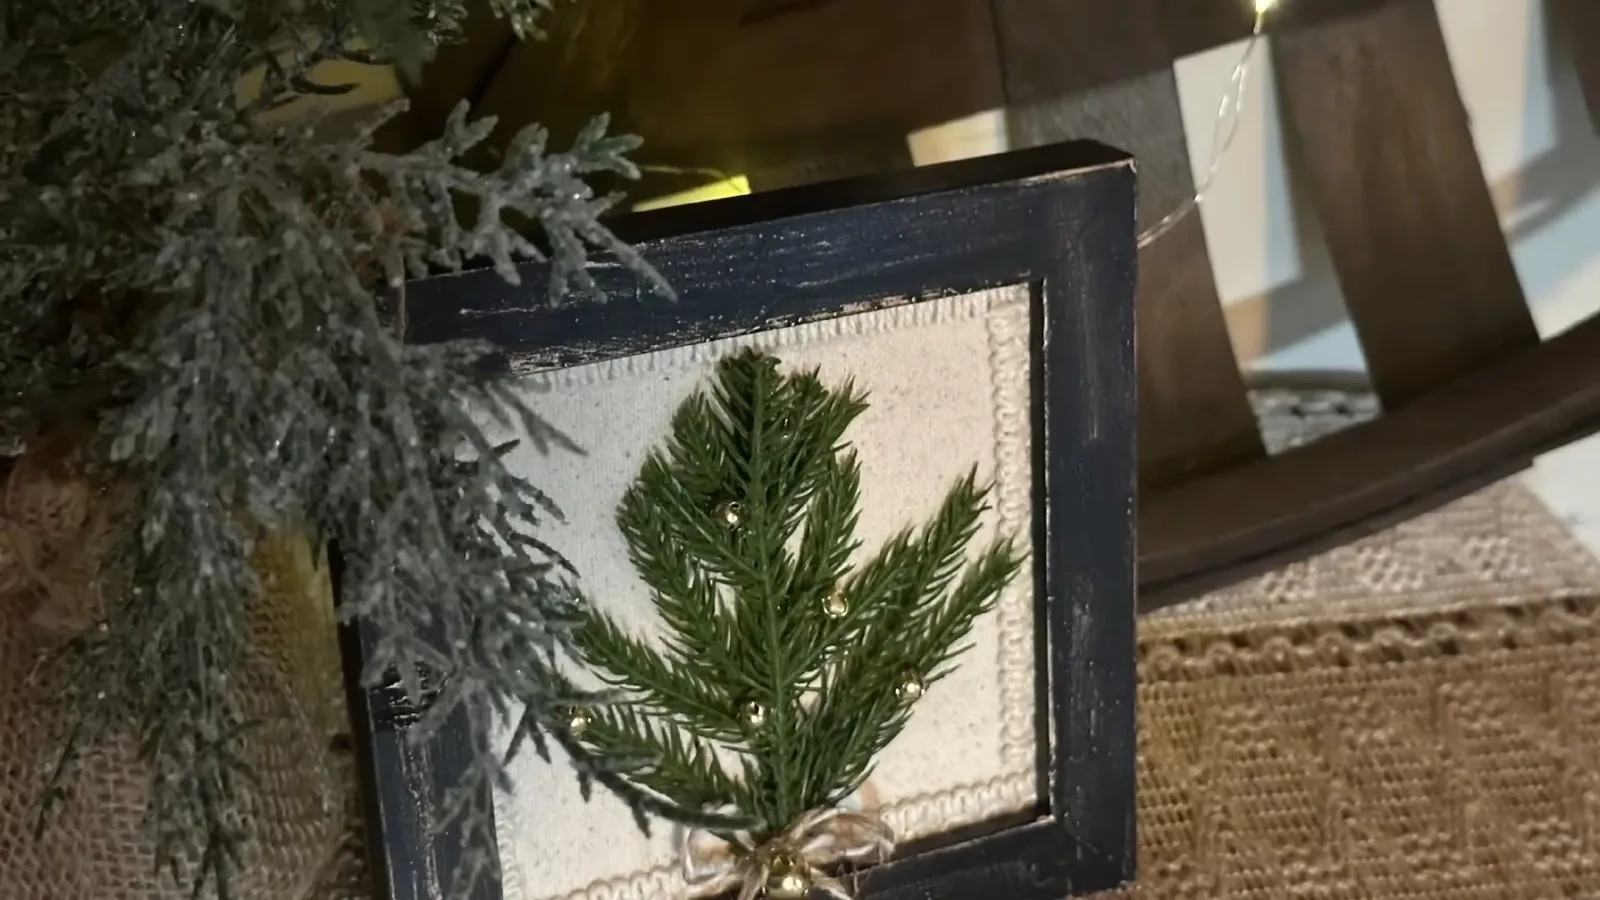
Add miniature bells with needle-nose pliers or fine craft wire, making sure they are secured rather than loose. A little antique-gold metallic wax rubbed onto the frame’s raised edges can soften a plain black finish. Let the finish cure as directed, then add a simple twine bow at the base of the tree.
For a softer farmhouse version, skip the gold accents and use an unfinished wood frame. For a more vintage look, choose a weathered black frame and a natural, slightly nubby cotton background.
5. Make budget swaps that still look intentional
Credits: Repurposed My Way ~ Shelly, CC BY;
Rustic decorating is forgiving, but it helps when your materials share a similar texture or color. These substitutions are easy to make without buying a whole new craft stash:
| Instead of buying | Try reusing | Check first |
|---|---|---|
| New wood-slice blanks | Small wood plaques or old ornament bases | Surface should be smooth, dry, and clean |
| Specialty snowman shapes | A flat snowman cutout or recycled wood offcut | Edges should be safe to handle |
| Decorative homespun ribbon | Strips of checked cotton from sewing scraps | Fabric should not fray excessively |
| A miniature tabletop tree | Two short pieces of leftover artificial garland | Stems must be secure on the backing |
| A new shadow-box frame | A thrifted frame used without its glass | Backboard must support the greenery |
Work in small batches: prepare several bases, paint all of the hats, and cut the scarves together. You will waste less paint and find it easier to keep a consistent color palette.
How to avoid the most common DIY problems
- Wrinkled decoupage paper: Use less adhesive, avoid overworking the wet napkin, and let each layer dry before sealing.
- Paint hiding the wood grain: Wipe the brush almost dry before distressing. Add thin layers gradually.
- Wax stopping paint or glue from sticking: Test compatibility on a scrap. Keep glued surfaces clean and follow the manufacturer’s sequence for coats and curing.
- Stamp marks that look too bold: Remove more paint from the stamp and press unevenly instead of making repeated full impressions.
- A framed tree that will not lie flat: Trim bulky ribbon, reposition stems, and glue down the lower greenery before placing the backing in its frame.
For safe crafting, sand wood in a ventilated area, follow finish labels, and protect your table when using hot glue or metallic wax. Keep hot glue guns, sharp tools, and small metal decorations away from children who cannot use them safely. Handmade pieces with loose bells or berries are decorative items, not toys.
Style and store your handmade Christmas decorations
Hang the snowman ornaments among simple wooden stars, natural pinecones, and warm white lights. They also work tied onto kraft-paper gift wrap. The framed tree looks best where its fabric texture can be seen up close: a sideboard, open shelf, or covered mantel away from heat and open flames.
If you like soft handmade details, pair these wood crafts with our step-by-step felt heart ornament tutorial. A few stitched felt pieces break up the hard surfaces of wood and metal without disrupting the rustic palette. Our guide to choosing felt for hand sewing is useful if you’re planning more fabric ornaments.
Let finishes cure fully before packing. Wrap each ornament separately in acid-free tissue or soft fabric, and store framed pieces where they cannot be crushed. If a decoration has glued evergreen sprigs, lay it flat rather than stacking heavy objects on top.
Frequently asked questions
Can I decoupage directly onto bare wood?
Yes, but a light base coat usually makes pale napkin patterns easier to see. Bare or very dark wood may show through the thin paper and change its colors. Try a sample if you want a more transparent, weathered finish.
What can I use instead of antiquing wax?
A compatible dark glaze or carefully thinned brown acrylic paint may give a similar aged color, although the working time and finish will differ. Try it on scrap wood first, especially if you plan to paint or glue over it later.
Can I make the framed tree without a glue gun?
Depending on the frame and backing, you can stitch some greenery to sturdy fabric or secure stems with craft wire through holes in a backing board. Make sure all fasteners are hidden or protected on the reverse and that the arrangement stays firmly attached.
Watch the original Christmas DIY video
To see the hand movements for sanding, stamping, dry brushing, and arranging greenery, watch the original project demonstration below. Video and project inspiration: Repurposed My Way ~ Shelly on YouTube.
Video and image credits: “Rustic Christmas DIYs on a Budget | Primitive Snowmen, Wood Slice Ornaments & Cozy Holiday Decor” by Repurposed My Way ~ Shelly, licensed under Creative Commons Attribution (CC BY), as identified in the original video’s YouTube license information. Screenshots used to illustrate individual steps were extracted from the video and compressed to WebP for web display; the text of this guide was independently adapted and expanded.